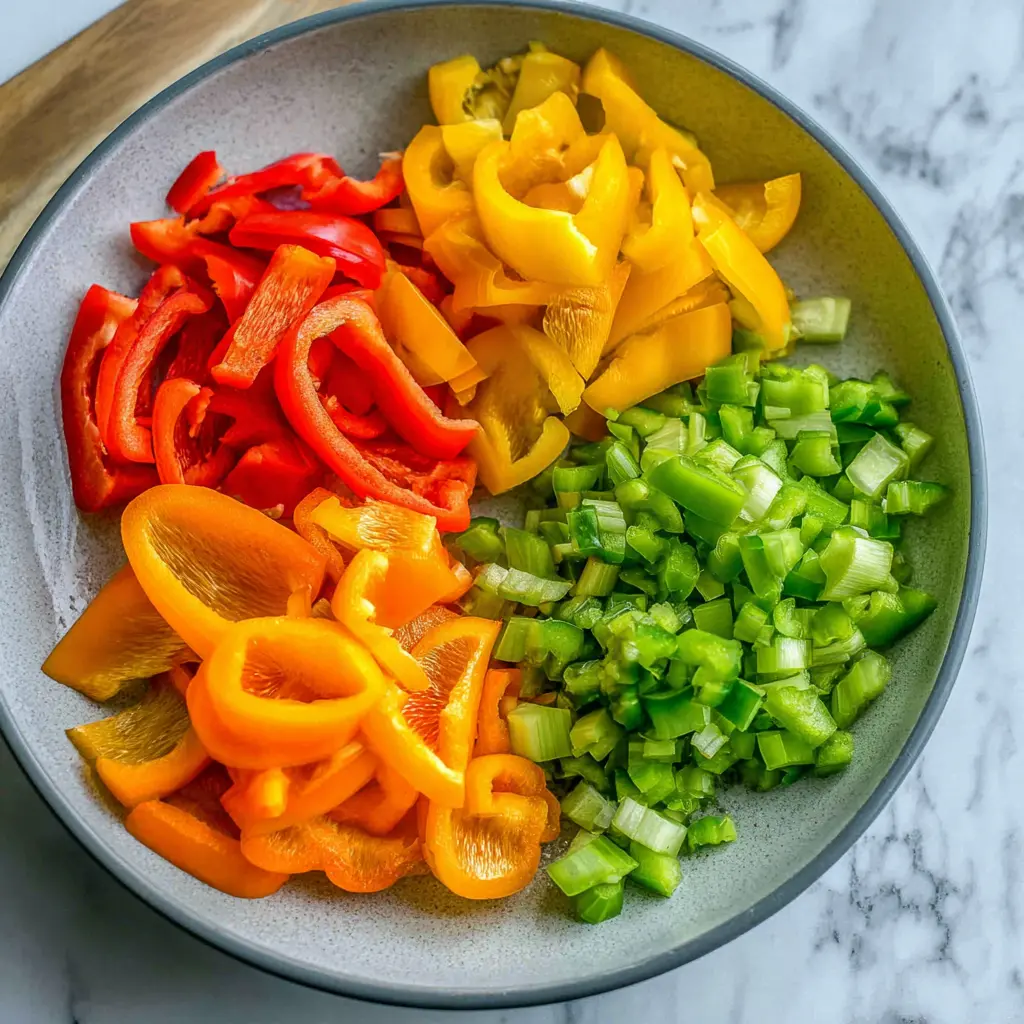
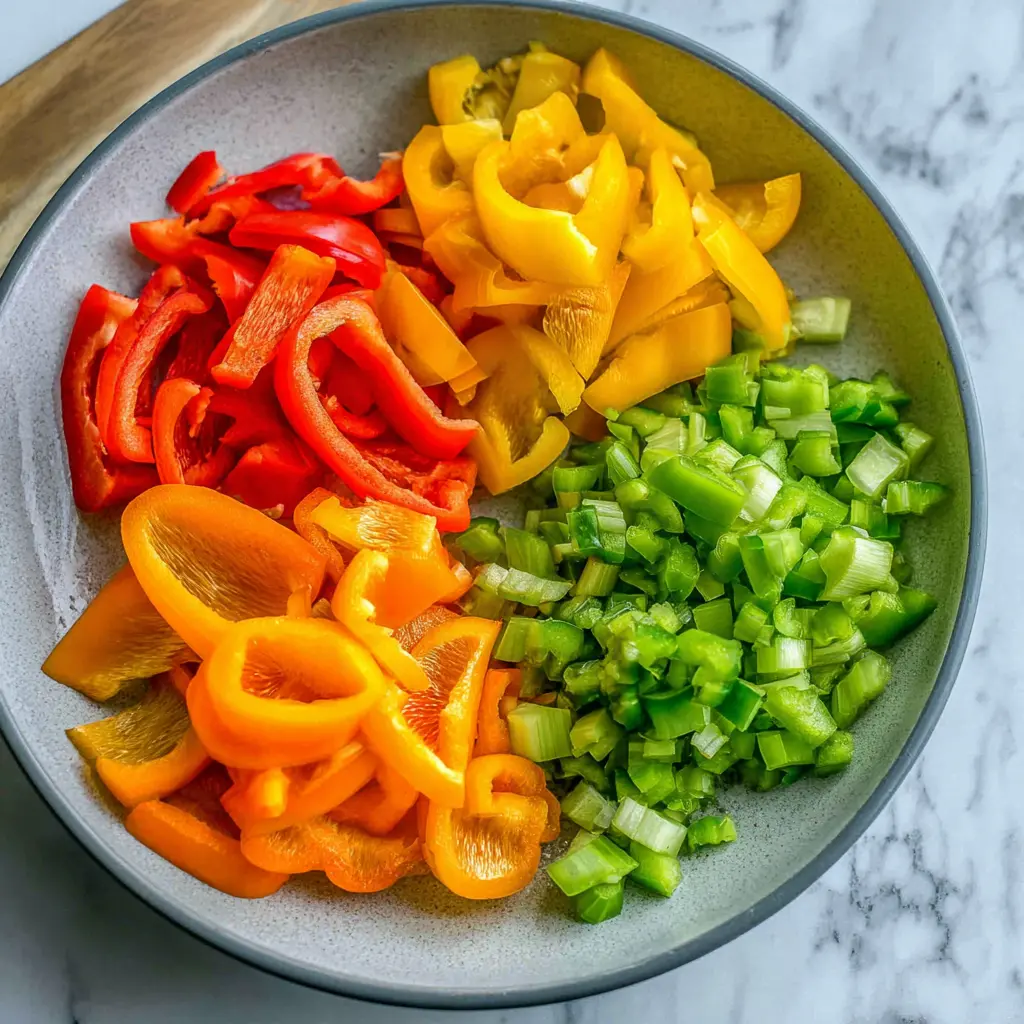
Essential Knife Skills: How to Cut a Bell Pepper Four Ways
Ingredients
Method
- Start by placing the bell pepper horizontally on your cutting board. Carefully slice off the top, where the stem is located, and also trim the bottom end. Discard the stem if it remains connected to the top piece. Position the pepper upright, then make a single vertical cut along one side. Gently guide your knife along the interior walls, separating the core and seeds, resulting in a single, long pepper strip.
- After removing the core, orient the bell pepper strip skin-side down on your cutting surface. Carefully scrape away any pale white pith from the inner flesh. This step is crucial for achieving uniform thickness in your julienne strips.
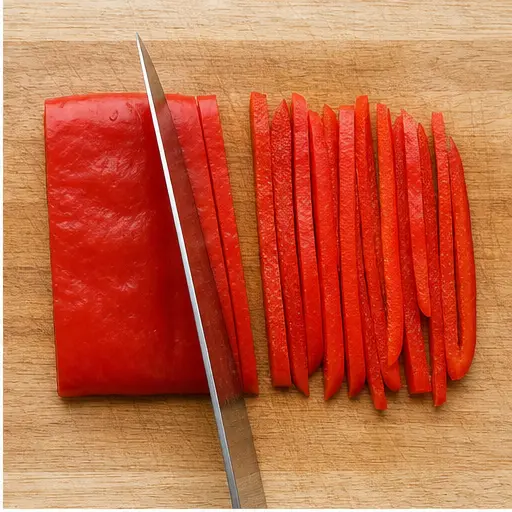
- With the pith now removed, slice the prepped bell pepper into slender julienne strips, aiming for dimensions of approximately 1/16 inch by 1/16 inch by 1 1/2 to 2 inches (about 2mm x 2mm x 4-5cm).
- Following core removal, lay the bell pepper strip flat on your cutting board. Cut it lengthwise into robust, wider strips.
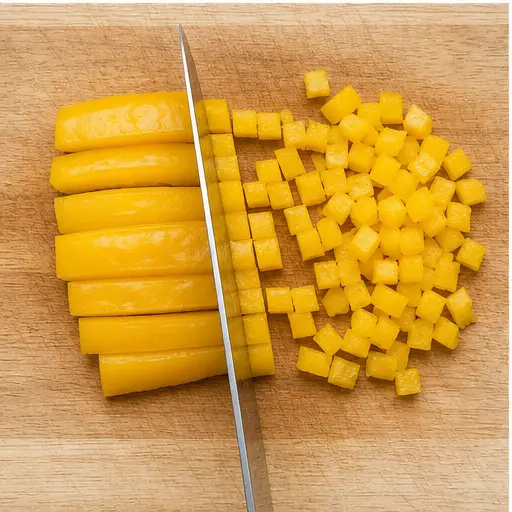
- Gather several of these strips together, then make perpendicular cuts across them to create uniform dice or small cubes of bell pepper.
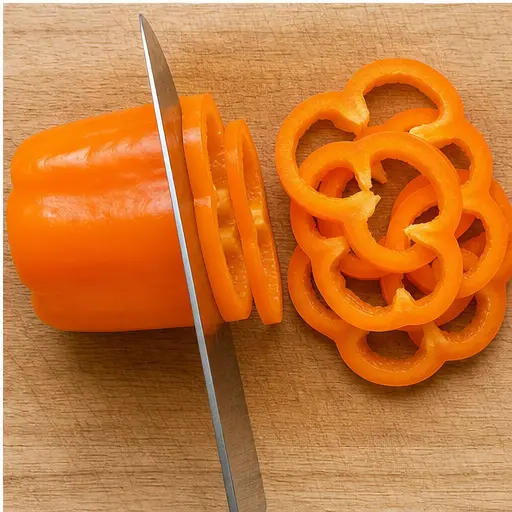
- Once the core is extracted, place the bell pepper horizontally. Using a very sharp knife, carefully slice thin cross-sections to form distinct, attractive bell pepper rings.
- For stuffing, only remove the stem end and internal core. Achieve this by carefully circling your knife around the inside perimeter of the pepper, ensuring the exterior walls remain whole and intact.
- After the core is gone, you might need to trim a small portion from the very bottom of the pepper to help it sit stably upright. Then, fill the hollowed-out bell pepper with your chosen stuffing.
Nutrition
Notes
Tried this recipe?
Let us know how it was!Essential Knife Skills for Bell Peppers
You know the feeling. You’re halfway through a recipe, and it calls for a diced bell pepper. You grab that beautiful red or yellow pepper from the fridge, and then you just… stare at it. How do you even start? I’ve been there, and honestly, I used to hack away at them, ending up with a mess of uneven chunks and a cutting board that looked like a crime scene. It was frustrating, and it made me not want to cook.
But here’s the thing: learning a few simple techniques for cutting bell pepper can change your entire cooking game. It’s not about being a master chef with a fancy knife set. It’s about building a little confidence and making your time in the kitchen way more enjoyable. Once you get the hang of it, prepping a pepper takes maybe a minute, and you get beautiful, uniform pieces every time. It’s easier than you think, I promise.
In this guide, we’re going to walk through four versatile ways to cut a bell pepper. We’ll cover dicing, julienning, slicing rings, and prepping for stuffing. Plus, I’ll share some safety tips and storage advice that I’ve picked up along the way. So grab a pepper and your favorite knife, and let’s do this.
Why Master Bell Pepper Cuts?
So, why bother learning different cuts? Well, it’s all about the dish. A chunky dice is perfect for a hearty chili or a chunky salsa where you want a little bite. Thin julienne strips are ideal for stir-fries because they cook quickly and evenly. Rings look fantastic on a sandwich or fajita platter. And prepping a pepper for stuffing? That’s a whole different skill. Having these techniques in your back pocket means you can tackle any recipe with confidence.
Plus, there’s something really satisfying about a clean cut. When you slice through a crisp pepper and get that perfect piece, it just feels good. It makes the whole cooking process feel less like a chore and more like you’re actually creating something. And let’s be real, a dish with uniformly cut vegetables just looks more professional and appetizing.
Tools You’ll Need for Cutting
You don’t need a lot of fancy gear, but having the right tools makes a world of difference. Here is what I always use:
- A sharp chef’s knife: This is non-negotiable. A dull knife is way more dangerous than a sharp one because it slips. An 8-inch chef’s knife is perfect for most tasks.
- A sturdy cutting board: Wood or plastic is fine. Just make sure it doesn’t slide around on your counter. You can put a damp paper towel underneath to keep it steady.
- A paring knife (optional): This can be handy for removing the core, but a chef’s knife works great too.
- A small bowl for scraps: To keep your workspace tidy.
And that’s really it. The most important tool is a sharp knife. I know it sounds counterintuitive, but a sharp knife is safer because it requires less force to cut. It’s less likely to slip off the pepper’s skin and into your finger. Trust me on this one.
How to Choose the Best Bell Peppers
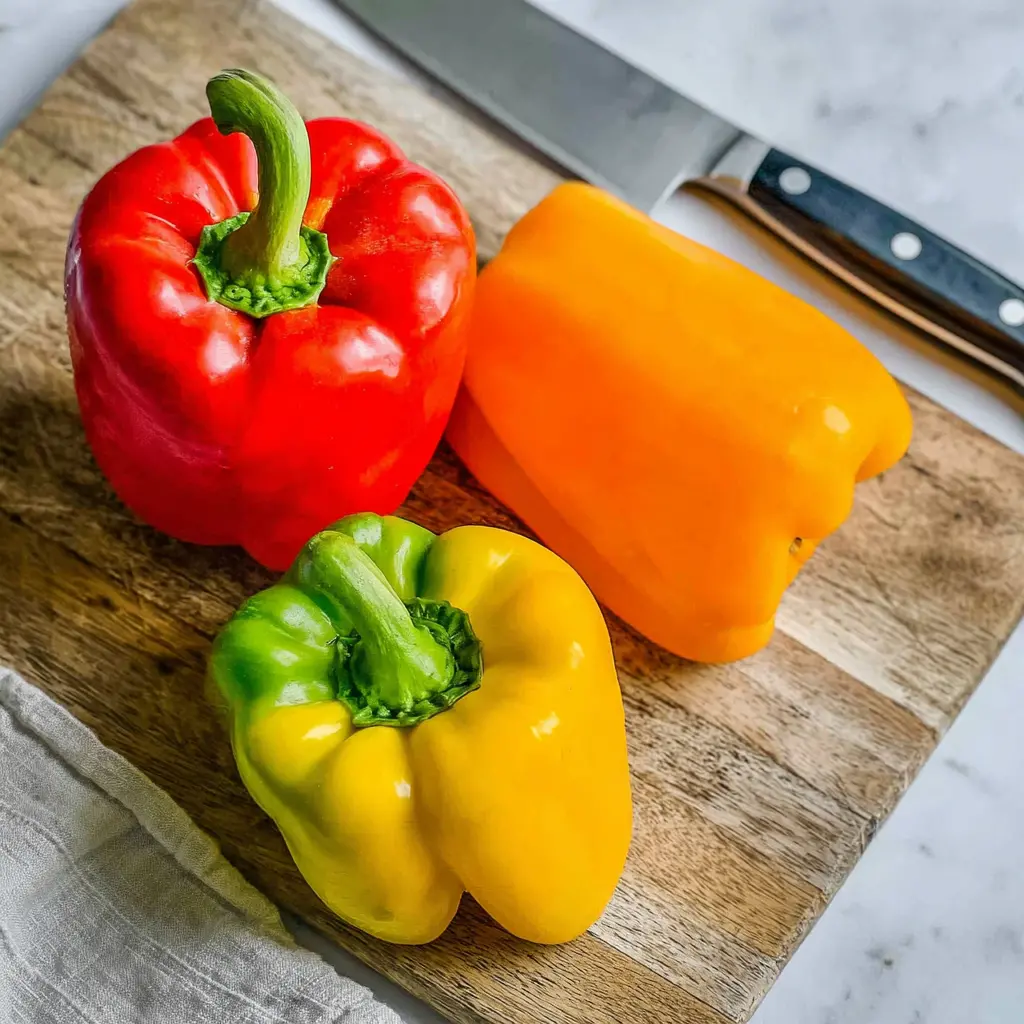
Before we even start cutting, let’s talk about picking the right pepper. You want one that’s firm to the touch, with smooth, glossy skin. Avoid any that have soft spots, wrinkles, or blemishes. The stem should look green and fresh, not dried out. A good pepper should feel heavy for its size, which means it’s full of moisture and will be nice and crisp.
For general use, any color works. But if you’re making stuffed peppers, look for ones that are wide and squat, with a flat bottom so they stand up nicely in the baking dish. For rings, you want peppers that are long and relatively straight. It just makes the rings more uniform.
Understanding Bell Pepper Colors & Flavors
You’ve probably noticed that bell peppers come in a rainbow of colors: green, red, yellow, orange, and even purple or white. But did you know they’re actually all the same fruit at different stages of ripeness? Green peppers are the least ripe, which is why they have that slightly bitter, grassy flavor. As they ripen, they turn yellow, then orange, and finally red. Red peppers are the sweetest and most nutritious, with the highest amount of vitamin C.
So, which one should you use? For stir-fries and salads where you want a pop of sweetness, go for red, yellow, or orange. For savory dishes like chili or fajitas where you want a more robust, slightly bitter flavor, green peppers are perfect. And honestly, mixing colors in a dish just makes it look so much more vibrant and appealing. It’s an easy way to make your food look restaurant-quality.
Step-by-Step: Preparing Your Bell Pepper
Alright, let’s get to the good stuff. This first step is the same for almost every cut, and it’s the most important part. We’re going to remove the core and seeds cleanly and efficiently.
How to Remove the Core & Seeds
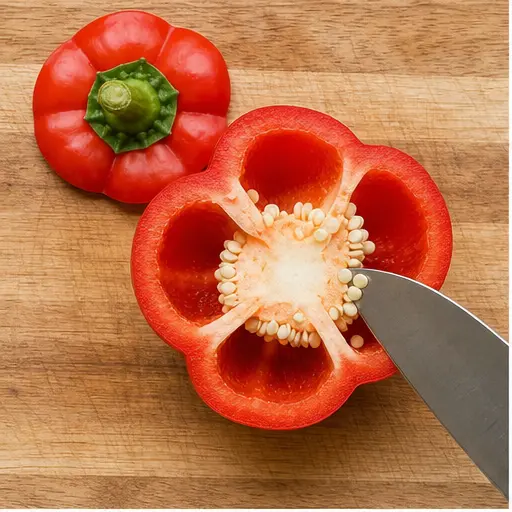
Start by placing your bell pepper horizontally on the cutting board. Using your sharp chef’s knife, carefully slice off the top, right where the stem is. Then, slice off the bottom as well. You’ll be left with a hollow cylinder. Now, stand the pepper upright on one of its flat ends. Make a single vertical cut down one side of the pepper. Gently guide your knife along the interior walls, separating the core and seeds from the flesh. You should end up with one long, flat strip of pepper, with the core and seeds attached to the inside.
This method is so much cleaner than trying to scoop out the seeds from a whole pepper. It minimizes waste and gives you nice, flat pieces to work with. Don’t throw away those tops and bottoms, by the way! They’re perfect for snacking or adding to a soup stock.
Why Remove the White Pith?
Before you start cutting your pepper strip into specific shapes, take a moment to look at the inside. You’ll see some pale white, spongy ridges running along the flesh. That’s the pith. It’s not poisonous or anything, but it can be a little bitter and tough. For the best flavor and texture, especially when you’re making julienne strips or dice, you want to remove it.
Just lay the pepper strip skin-side down on your board and use your knife to carefully scrape or slice away those white bits. It’s a small extra step, but it makes a big difference in the final dish. You’ll get cleaner cuts and a sweeter, more pleasant flavor.
How to Cut Bell Pepper Strips (Julienne)
Julienne strips are those thin, matchstick-like pieces you see in fancy stir-fries and salads. They look super professional, but they’re actually really easy to do. After you’ve removed the core and the pith, you’re ready to go.
Take your flat pepper strip and place it skin-side down on the cutting board. Using your sharp knife, slice the pepper lengthwise into thin strips. Aim for about 1/16 inch thick, or roughly the width of a matchstick. Don’t stress if they’re not all perfectly uniform. Just try to keep them consistent for even cooking. You can also stack a few strips on top of each other to speed things up.
Best Uses for Julienne Strips
Julienned bell peppers are incredibly versatile. Here are a few of my favorite ways to use them:
- Stir-fries: They cook in seconds and add a beautiful crunch.
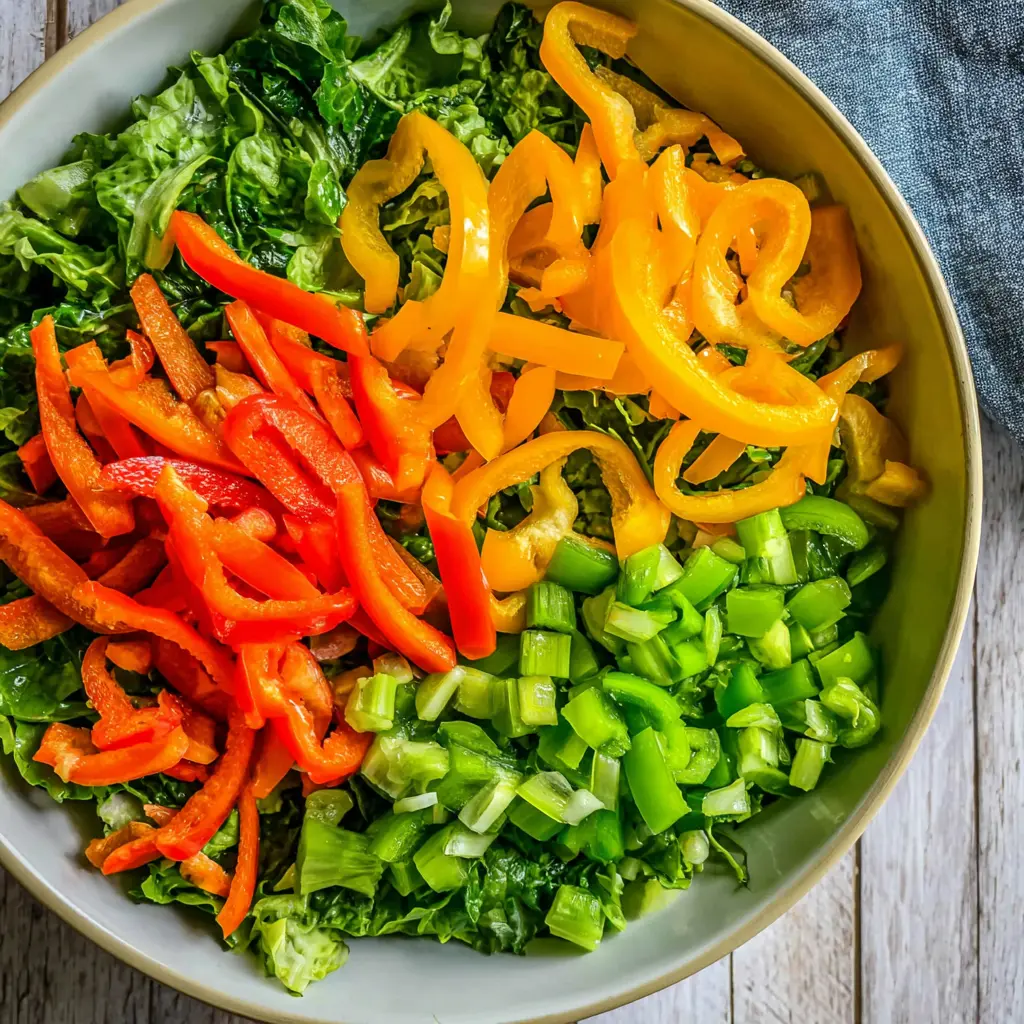
- Salads: They add a pop of color and a fresh, crisp texture.
- Spring rolls or lettuce wraps: They’re the perfect size for rolling.
- Garnish: A small pile of julienned red pepper on top of a soup or dip looks amazing.
How to Dice Bell Peppers
Dicing is probably the most common cut you’ll use. It’s perfect for salsas, omelets, chili, and so many other dishes. Once you’ve got the core and pith removed, dicing is a breeze.
Start by cutting your flat pepper strip lengthwise into wider strips, about 1/2 inch thick. Then, gather a few of these strips together. Make perpendicular cuts across them to create small, uniform cubes. The size of the dice is up to you. For a fine dice, cut the strips thinner and the cubes smaller. For a chunky dice, keep the strips wider.
Popular Dishes for Diced Peppers
Diced bell peppers are a kitchen staple. Here are some dishes where they really shine:
- Salsas: A fresh tomato salsa with diced red onion and bell pepper is a summer classic.
- Omelets and scrambled eggs: Sauté them first for a flavor boost.
- Chili and stews: They add texture and sweetness.
- Rice dishes: Think of a simple yellow rice with peas and diced peppers.
- Mirepoix: A mix of diced onion, carrot, and celery (and sometimes bell pepper) is the base for so many soups and sauces.
Slicing Bell Pepper Rings
Bell pepper rings are not just for show. They’re perfect for fajitas, sandwiches, and even as a fun, edible garnish. This cut is slightly different because you want to keep the pepper’s shape intact.
After you’ve removed the core using the method above, you’ll have a hollow pepper cylinder. Now, just place it horizontally on your cutting board. Using your sharp knife, carefully slice thin cross-sections to form distinct rings. You can make them as thick or as thin as you like, but about 1/4 inch is a good place to start.
When to Use Bell Pepper Rings
Rings are a fun and functional cut. Here are some ideas:
- Fajitas: They look amazing on the sizzling platter.
- Sandwiches and burgers: A thick ring adds a nice crunch.
- Crudité platters: They’re easy to pick up and dip.
- Roasted peppers: You can roast them whole and then slice into rings.
- Garnish for cocktails: A ring on a Bloody Mary or a margarita? Yes, please.
Preparing Bell Peppers for Stuffing
Stuffed peppers are a classic comfort food. The key is to keep the pepper whole so it can hold all that delicious filling. The technique is a little different here.
Start by cutting the top off the pepper, just below the stem. You want to remove the stem and the top part of the pepper. Then, carefully use your knife to cut around the inside perimeter of the pepper, separating the core and seeds from the walls. You can then pull out the core in one piece. You might need to trim a tiny bit off the bottom of the pepper so it sits flat in your baking dish. And that’s it! You have a perfect little cup ready for stuffing.
Choosing the Right Pepper for Stuffing
For stuffed peppers, you want peppers that are wide and have a flat, stable bottom. Red, yellow, and orange peppers are great because they’re sweeter, but green peppers work well too if you prefer a more savory flavor. Just make sure they’re large enough to hold a good amount of filling.
Expert Tips for Cutting Bell Peppers
Over the years, I’ve picked up a few tricks that make the whole process smoother. Here are some of my favorites:
- Always use a sharp knife. I can’t say this enough. It’s safer and gives you cleaner cuts.
- Wash your peppers thoroughly before cutting, even if you’re going to remove the skin.
- Don’t waste the trimmed tops and bottoms. They’re perfect for snacking, adding to a salad, or freezing for soup stock.
- For a higher yield, dice the ends of the pepper instead of just discarding them.
- If you’re prepping for a party, you can cut your peppers a day in advance to save time.
Can You Prep Bell Peppers in Advance?
Absolutely! This is a huge time-saver for busy weeknights. Cut bell peppers will stay fresh in the fridge for 3-5 days. Just make sure to store them properly. The key is to keep them dry. Place them in an airtight container with a paper towel to absorb any excess moisture. The paper towel will keep them from getting soggy. You can also store them in a zip-top bag with the air squeezed out.
How to Store Cut Bell Peppers
Proper storage is essential for keeping your prepped peppers crisp and flavorful. Here’s the best way to do it:
- Whole bell peppers: Store them in the crisper drawer of your fridge for up to 2 weeks. An open plastic bag is fine.
- Cut bell peppers: Place them in an airtight container or a zip-top bag with a paper towel. They’ll last 3-5 days.
- Freezing cut peppers: You can freeze them! Flash freeze them on a baking sheet, then transfer to a freezer-safe bag. They’ll last for 6-8 months. They’re best used in cooked dishes after freezing.
Common Bell Pepper Cutting Mistakes
Even experienced cooks make mistakes sometimes. Here are a few common ones to watch out for:
- ❌ Using a dull knife: This is the most common mistake. A dull knife is more likely to slip, leading to uneven cuts and potential injury. ✅ Always start with a sharp knife.
- ❌ Not removing the seeds: The seeds are tough and can add a bitter taste to your dish. ✅ Take the extra 30 seconds to remove them properly.
- ❌ Not removing the white pith: As I mentioned, the pith can be bitter and affects the texture of your cuts. ✅ Scrape it away for the best results.
- ❌ Cutting uneven pieces: This leads to uneven cooking. ✅ Try to keep your cuts as uniform as possible. Practice makes perfect!
Frequently Asked Questions
Bell Pepper Recipes to Try
Now that you’re a pro at cutting bell peppers, here are a few recipes to put those skills to use:
- Quick Chicken Fajitas: Sauté sliced bell pepper rings and onion with seasoned chicken strips. Serve in warm tortillas.
- Summer Corn and Bell Pepper Salad: Toss diced bell peppers with fresh corn, cherry tomatoes, and a lime vinaigrette.
- Easy Stuffed Bell Peppers: Fill hollowed-out peppers with a mixture of cooked rice, ground beef or turkey, and tomato sauce. Bake until tender.
- Red Pepper and Tomato Soup: Sauté diced onion and bell pepper, then add canned tomatoes and broth. Simmer and blend until smooth.
I hope this guide has given you the confidence to tackle that bell pepper in your fridge. Remember, it’s all about practice. The more you do it, the faster and more comfortable you’ll become. And if you mess up a cut? No big deal. Just toss it in the stir-fry anyway. It’ll still taste amazing. Happy cooking!
For more tips and inspiration, check out our Pinterest board for more vegetable prep ideas and delicious recipes.
Source: Health & Nutrition Research