
Easy Keto Pizza Crust Almond Flour Recipe for Crispy, Chewy Crust
Ingredients
Method
- Preheat your oven to 425 degrees F. Line a baking sheet or pizza pan with parchment paper. For best results, place a pizza stone in the oven while it preheats, then line a pizza peel with parchment paper to prepare the crust.
- In a large bowl or food processor, combine the egg(s) with either the almond flour or coconut flour, depending on which version you are making. Using a food processor gives a fluffier crust and is easier, but mixing by hand works fine too.
- In a medium microwave-safe bowl, combine the shredded mozzarella and cubed cream cheese. Microwave for 90 seconds, stirring halfway through. Stir again at the end until smooth and well incorporated. Alternatively, melt the cheeses in a double boiler on the stove.
- Add the melted cheese mixture to the flour-egg mixture. Process in the food processor or knead with your hands until a uniform dough forms with no streaks. If the cheese hardens before fully mixing, microwave the dough for 10-15 seconds to soften it. If the dough feels sticky, lightly wet your hands or use a little extra almond flour.
- Spread the dough onto the lined baking sheet or pizza peel to about 1/4 to 1/3 inch thickness. Use your hands or a rolling pin over a piece of parchment paper (a rolling pin works better). Poke lots of holes all over the crust with a toothpick or fork to prevent bubbling during baking.
- Bake the crust for 6 minutes. If using a pizza stone, slide the parchment paper with the crust onto the hot stone. Remove from the oven and poke more holes in any bubbles that have formed. Return to the oven and bake for another 3-7 minutes, until the crust is lightly golden. Be careful not to over-brown at this stage, or the edges may burn when you add toppings.
- After pre-baking, top the crust with your favorite low-carb pizza sauce, cheese, and toppings. Return the pizza to the oven—directly on the pizza stone or on the oven rack (no parchment)—and bake for about 10 minutes, until hot and bubbly. For a browned cheese top, place under the broiler for 1-2 minutes.
Nutrition
Notes
Tried this recipe?
Let us know how it was!Why You’ll Love This Keto Pizza Crust
You know that feeling. It’s a Friday night, you’re tired, and all you want is a slice of pizza. But you’re doing keto, and the thought of a sad cauliflower crust or some weird cloud bread just doesn’t cut it. I’ve been there. More times than I can count.
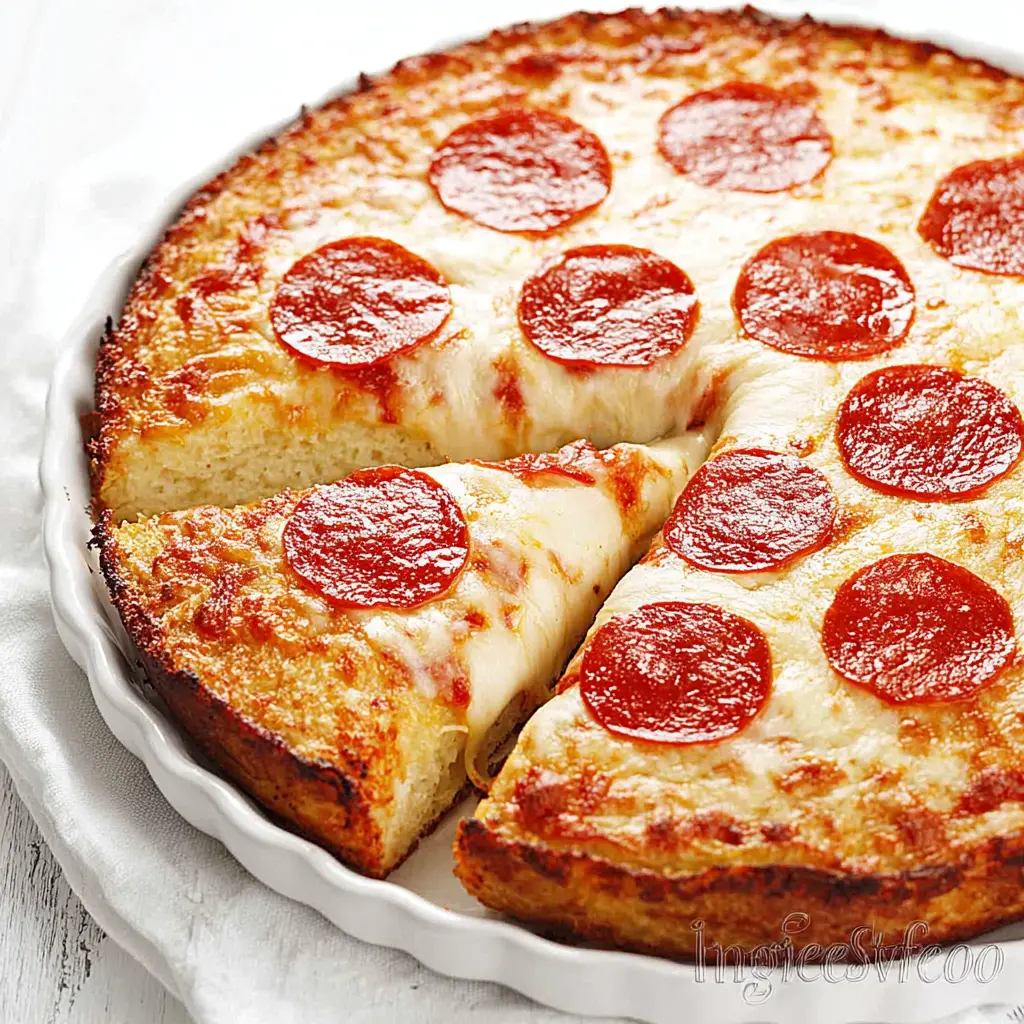
This keto pizza crust almond flour recipe is the one that finally worked for me. It’s not just “good for keto.” It’s genuinely good pizza. It’s crispy on the outside, chewy on the inside, and it holds up to a generous pile of toppings without turning into a soggy mess. And the best part? It comes together in about 20 minutes. No yeast, no rising time, no complicated steps.
I remember the first time I made a low carb pizza crust that actually worked. I was skeptical. But when I pulled that golden, firm crust out of the oven, I knew I had something special. The smell of melted cheese and toasted almonds filled the kitchen. It felt like a small victory. And honestly, it kind of was.
This recipe uses the fathead dough method, which is basically a game-changer for anyone on a keto diet. It’s a keto pizza base that’s sturdy, flavorful, and incredibly satisfying. Whether you’re a keto veteran or just starting out, this crust will become your go-to.
Ingredients and Substitutions
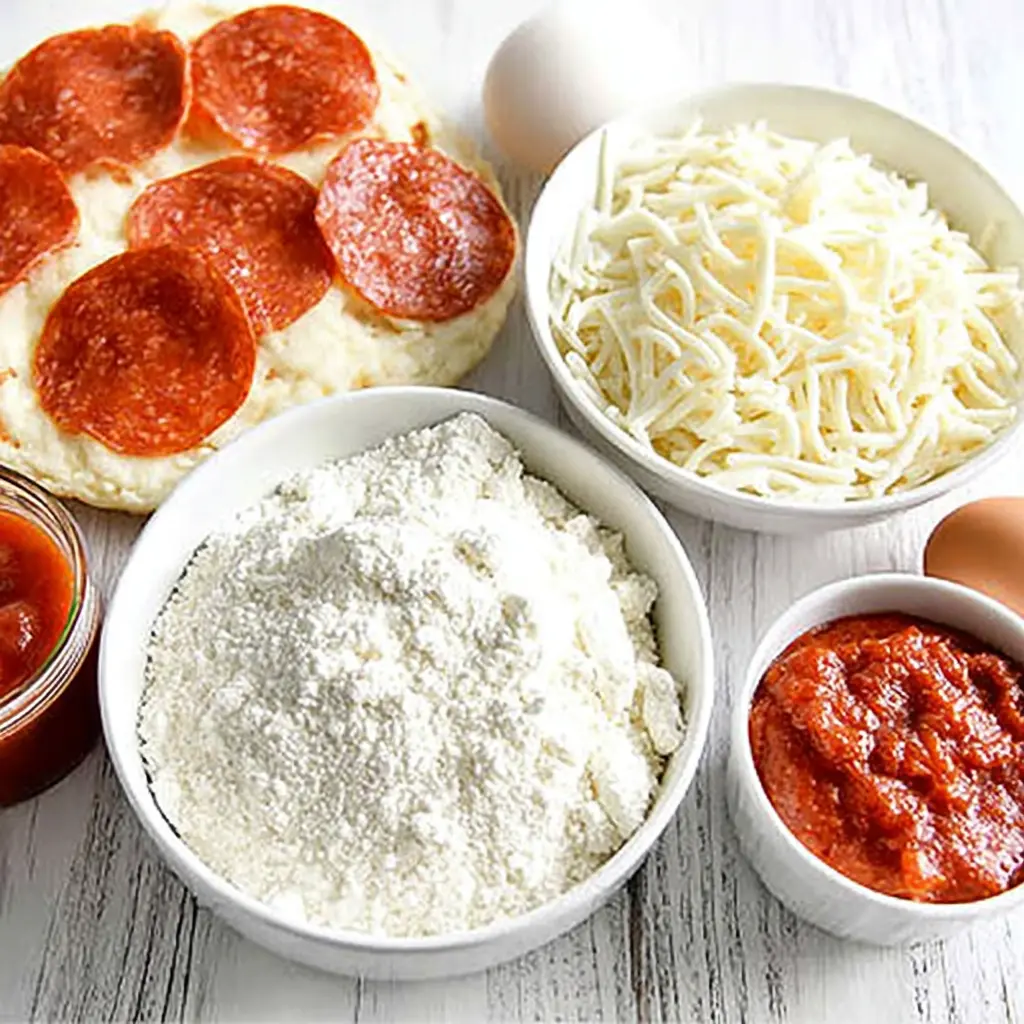
The beauty of this keto pizza crust almond flour recipe is its simplicity. You only need a handful of ingredients, most of which you probably already have in your kitchen.
Here’s what you’ll need for the main almond flour version:
- 1 1/2 cups shredded mozzarella cheese (low-moisture, part-skim is best)
- 2 tablespoons cream cheese (softened and cubed)
- 1 large egg
- 3/4 cup blanched almond flour (finely ground, like Wholesome Yum or Blue Diamond)
That’s it. Four ingredients. And the best part? You can swap out the almond flour for coconut flour if you need a nut-free option. Just use 1/3 cup of sifted coconut flour and 2 large eggs instead of one. The coconut flour version is a bit more delicate, but it works beautifully.
Now, let’s talk about that almond flour. This is important. You want blanched almond flour, not almond meal. Almond meal is made from whole almonds with the skin on, which gives it a coarser texture and a darker color. It’ll make your crust gritty and dense. Blanched almond flour is finely ground and has a light, fluffy texture that’s perfect for baking. Trust me on this one. I learned the hard way.
And for the cheese? Low-moisture mozzarella is key. The fresh stuff in water has too much moisture and will make your crust soggy. Part-skim is fine, but whole milk works too. Just avoid the pre-shredded bags that have anti-caking agents, as they don’t melt as smoothly.
How to Make Keto Pizza Crust
Okay, let’s get into the actual process. I’ll walk you through the four main stages. Each one is pretty straightforward, but I’ll share some tips I’ve picked up along the way.
Stage 1: Melting the Cheeses
Start by preheating your oven to 425°F. Line a baking sheet or pizza pan with parchment paper. If you have a pizza stone, put it in the oven now to heat up. I use a stone, and it makes a real difference in getting that crispy bottom.
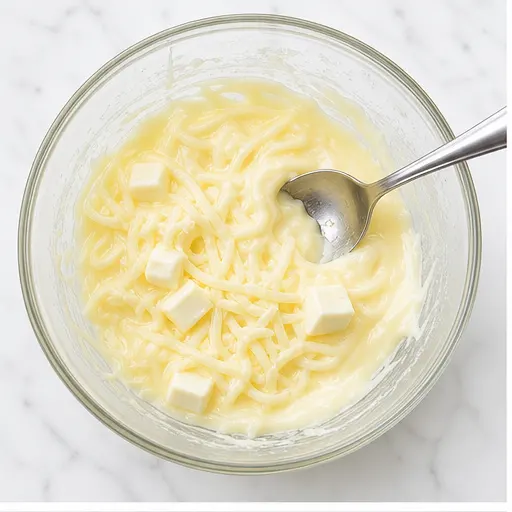
In a medium microwave-safe bowl, combine the shredded mozzarella and cubed cream cheese. Microwave for 90 seconds, stirring halfway through. When it comes out, stir again until it’s smooth and fully combined. It should look like a glossy, stretchy cheese sauce. If it’s not quite there, give it another 15 seconds.
This is where the magic happens. The cream cheese helps keep the crust tender and prevents it from becoming rubbery. It’s a small addition, but it makes a big difference.
Stage 2: Mixing the Dough
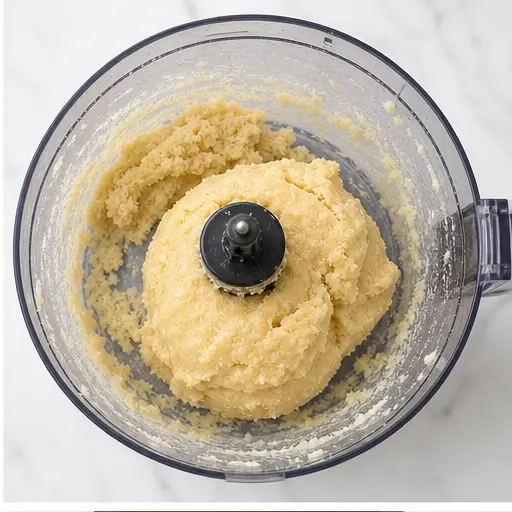
While the cheese is melting, combine the egg and almond flour in a large bowl or a food processor. I prefer the food processor because it gives you a fluffier, more uniform dough. But mixing by hand works fine too, just be prepared for a bit of arm work.
Add the melted cheese mixture to the flour-egg mixture. Process or knead until a uniform dough forms. You’re looking for no streaks of cheese or flour. If the cheese hardens before it’s fully mixed, just pop the whole thing in the microwave for 10-15 seconds to soften it up. If the dough feels too sticky, lightly wet your hands or sprinkle in a little extra almond flour.
The dough should be smooth and pliable, like a soft play-dough. It’s a little warm from the cheese, which makes it easier to work with.
Stage 3: Shaping the Crust
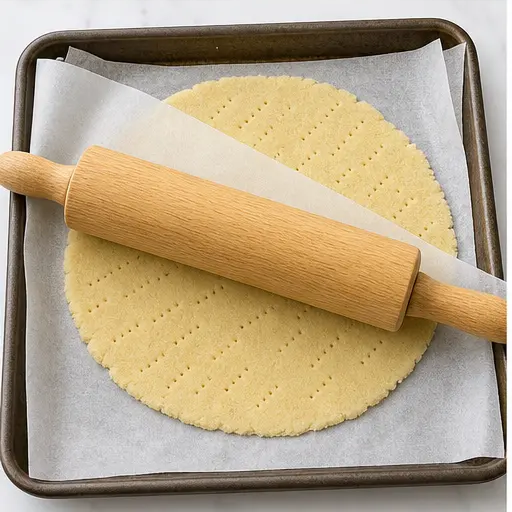
Now, spread the dough onto your lined baking sheet or pizza peel. Aim for about 1/4 to 1/3 inch thickness. I find that using a rolling pin over a piece of parchment paper works best. It gives you an even thickness without sticking. If you don’t have a rolling pin, just use your hands. It’s a bit messier, but it works.
Before baking, poke lots of holes all over the crust with a toothpick or fork. This is crucial. It prevents the crust from bubbling up like a balloon in the oven. Trust me, I’ve forgotten this step, and it’s not pretty. The crust ends up with giant air pockets that make it uneven.
If you’re using a pizza stone, slide the parchment paper with the crust directly onto the hot stone. This gives you an incredible crispy bottom.
Stage 4: Pre-Baking and Finishing
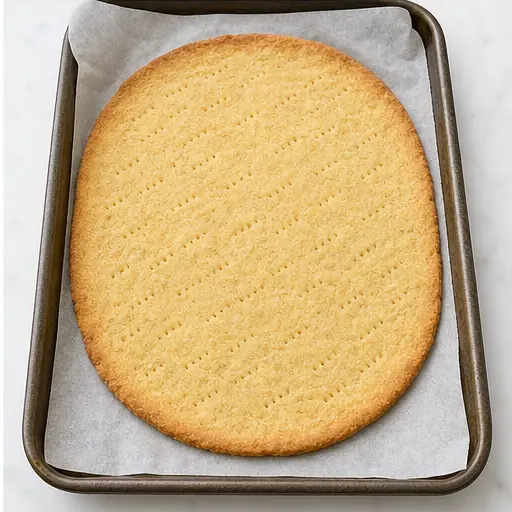
Bake the crust for 6 minutes. Then, remove it from the oven and poke more holes in any bubbles that have formed. Yes, even after all that poking, some bubbles might still appear. Just pop them with a fork.
Return the crust to the oven and bake for another 3-7 minutes, until it’s lightly golden. Be careful not to over-brown it at this stage, or the edges might burn when you add the toppings. The crust should be firm to the touch and slightly golden around the edges.
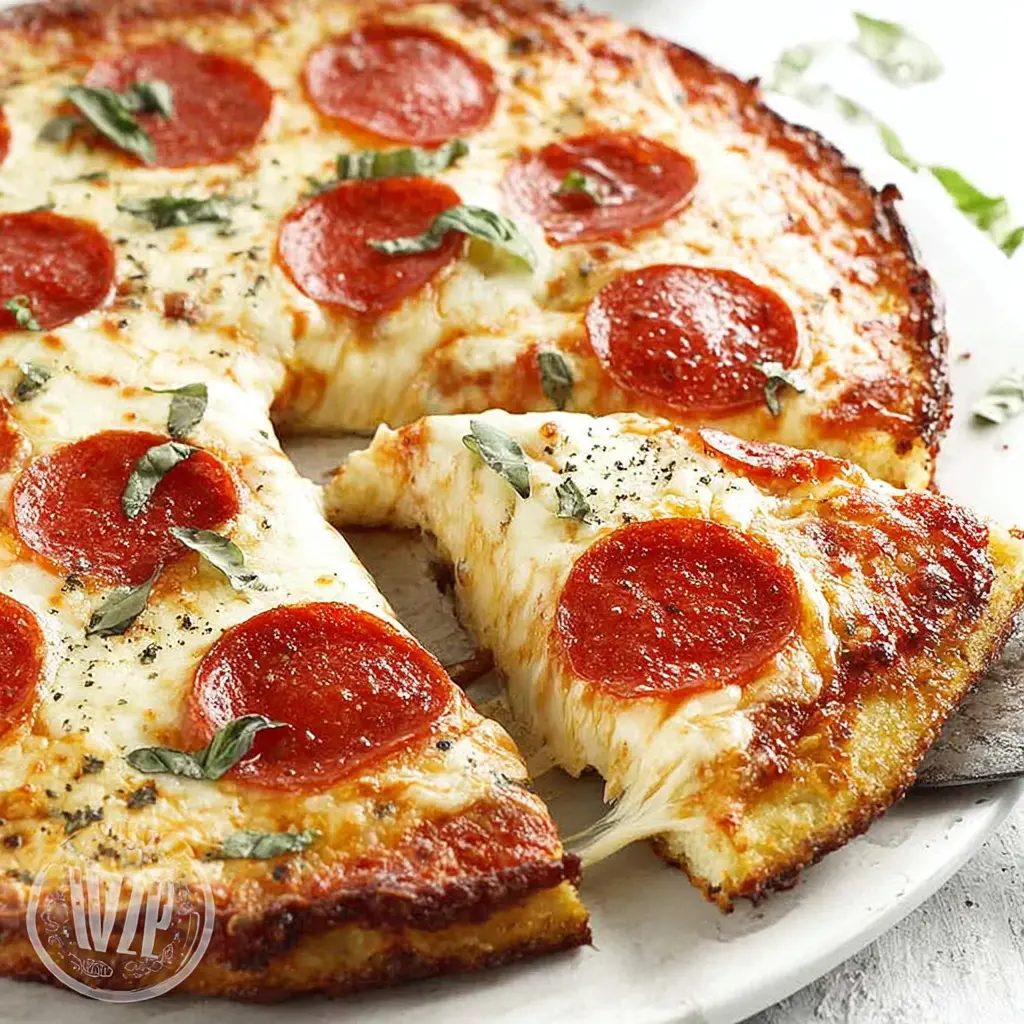
Now, the fun part. Add your toppings. I like a thin layer of sugar-free pizza sauce, a generous sprinkle of mozzarella, and some pepperoni. But you can go wild with whatever you like. Just avoid water-releasing vegetables like raw zucchini or mushrooms, as they’ll make the crust soggy.
Return the pizza to the oven (directly on the rack or stone, no parchment) and bake for about 10 minutes, until hot and bubbly. For a nicely browned cheese top, place it under the broiler for 1-2 minutes. Keep an eye on it, though. Broilers are fast.
Expert Tips for the Best Crust
Over the years, I’ve made a lot of keto pizza dough. Some were great, some were… less great. Here are the tips that have made all the difference for me.
- Use fine blanched almond flour. I can’t stress this enough. It’s the difference between a smooth, tender crust and a gritty, sandy one.
- Roll between parchment paper. This prevents sticking and makes it easy to transfer the crust to the baking sheet.
- Pre-bake the crust. This is non-negotiable. It sets the structure and prevents a soggy bottom.
- Use a thin layer of sauce. Too much sauce will make the crust soggy. A thin, even layer is all you need.
- Avoid water-releasing vegetables. If you want veggies, sauté them first to remove excess moisture.
- Prick the crust with a fork. This prevents bubbling and ensures even baking.
- Don’t over-brown the edges during pre-bake. They’ll get a second bake with the toppings, so keep them light.
One more thing: if the dough feels too dry, add a tablespoon of water. If it’s too sticky, wet your hands or add a little more almond flour. The texture should be pliable and easy to work with.
Texture Variations
Want a crispier crust? Roll it thinner. Aim for 1/8 inch instead of 1/4 inch. You’ll need to adjust the baking time, so keep an eye on it. A thinner crust will bake faster and get crunchier.
Want a chewier crust? You can add a tablespoon of tapioca flour or a teaspoon of xanthan gum to the dough. These ingredients add elasticity and chewiness. I’ve also heard of people adding a bit of gelatin powder for a similar effect. I haven’t tried it myself, but it’s worth experimenting with.
For a thicker, more bread-like crust, don’t roll it as thin. Keep it at 1/3 inch or even a little thicker. Just remember that a thicker crust will need a longer pre-bake time.
The beauty of this keto pizza base is that it’s incredibly versatile. You can make it your own with just a few tweaks.
Storage and Leftovers
One of the best things about this keto pizza crust almond flour recipe is that it’s perfect for meal prep. You can make the crust ahead of time and store it in the fridge for up to 3 days. Just wrap it tightly in plastic wrap or store it in an airtight container.
If you want to freeze it, you have two options. You can freeze the unbaked dough (between layers of parchment paper) for up to 2 months. Just thaw it in the fridge overnight before using. Or you can freeze the baked crust (without toppings) for up to a year. Wrap it tightly in plastic wrap and then foil.
For leftover topped pizza, store it in the fridge for 2-3 days. I like to put a paper towel in the container to absorb any excess moisture. When you’re ready to reheat, the oven is your best bet. Reheat at 350°F for 5-7 minutes. The microwave will make the crust soggy, so avoid it if you can.
If you’re reheating a frozen pizza, don’t thaw it first. Just pop it in the oven at 350°F until it’s hot and bubbly. It usually takes about 10-12 minutes.
Frequently Asked Questions
More Keto Pizza Recipes
Once you’ve mastered this keto pizza crust almond flour recipe, the possibilities are endless. Here are a few of my favorite variations:
- Buffalo Chicken Pizza: Top with shredded chicken, buffalo sauce, and blue cheese crumbles.
- BBQ Chicken Pizza: Use sugar-free BBQ sauce, shredded chicken, and red onion.
- Margherita Pizza: Fresh mozzarella, tomato slices, and basil leaves.
- Pesto Breakfast Pizza: Spread with pesto, top with an egg, and bake until the egg is set.
- Greek Veggie Pizza: Add olives, feta cheese, and sun-dried tomatoes.
Each one is a keto dinner idea that feels indulgent but fits perfectly into your macros. And because the crust is so sturdy, you can load it up without worrying about it falling apart.
I hope this recipe becomes a staple in your kitchen like it has in mine. When you pull that golden, bubbly pizza out of the oven, take a moment to enjoy it. You deserve it. And if you want to share your creation, I’d love to see it. You can find me on Pinterest where I pin all my favorite keto recipes.
If you only remember three things from this article, let them be these: use blanched almond flour, pre-bake the crust, and don’t be afraid to experiment with toppings. Happy cooking!
Source: Nutritional Information



2 Responses
Solid recipe, but I found the crust a bit greasy. Maybe I overworked the cheese? Also, does the type of mozzarella matter? I used pre-shredded, which might have added more starch.
Good point, Robert! Pre-shredded mozzarella often has anti-caking agents that can affect texture. I recommend shredding your own from a block for the best results. Also, make sure to drain any excess fat from the dough before baking to avoid greasiness.