
Why You’ll Love This Crusted Chicken Romano
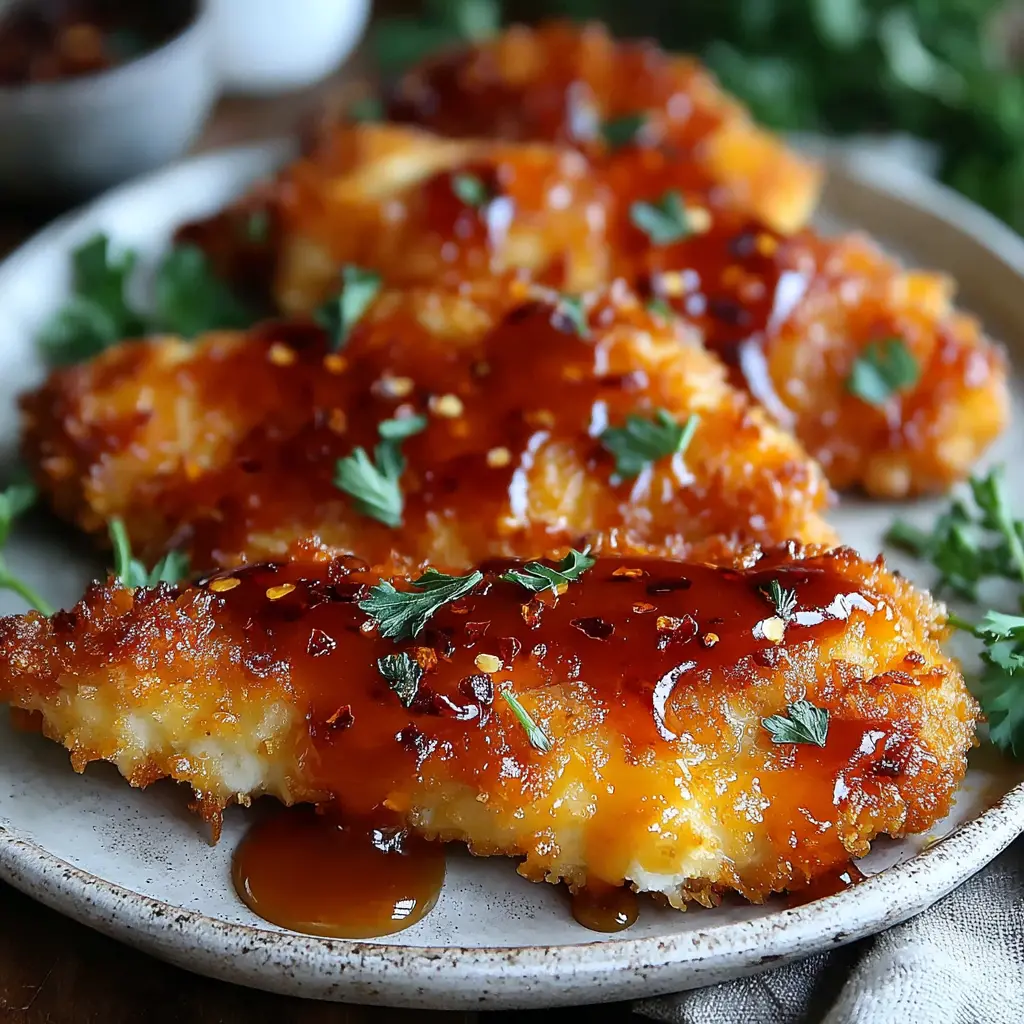
You know that moment at Cheesecake Factory when the server sets down the crusted chicken romano and you hear the crunch before your fork even touches it? That craggy, golden crust with the sharp salty bite of Romano. The tender, juicy chicken underneath. And then the lemon butter sauce, bright and glossy, cutting through all that richness.
What is chicken romano, exactly? It’s an Italian-American classic where sharp Romano cheese goes right into the crispy breading. No mozzarella blanket. No heavy marinara. The cheese IS the crust. That’s why this particular crusted chicken romano tastes like the restaurant version instead of an average breaded cutlet.
Here’s the thing: this cheesecake factory chicken romano recipe takes 30 minutes from start to finish. And it costs a fraction of that $23 restaurant plate. I’ve served this on random Tuesdays and at dinner parties. It gets the same reaction every time, wide eyes and a quiet “how did you make this?”
Before we get to the how, let’s settle the chicken romano vs chicken parmesan debate, because people mix these up constantly. Chicken parm gets breaded, smothered in mozzarella and marinara, then baked. Cozy and comforting. This version skips all that. The Romano goes into the coating itself, and the plate finishes with a light lemon butter sauce. Saltier, sharper, a little funky. That’s the difference, and it’s a big one.
And chicken romano vs chicken francese? Francese is dipped in egg, pan fried, and served with lemon butter. This dish has that shattering, cheesy crust instead. Similar sauce energy, totally different texture. A great crusted chicken romano is all about textural contrast, crackly outside, juicy inside.
- Crispy, not greasy. The panko-Romano crust stays crunchy because we don’t drown it in sauce.
- Simple technique. If you can dip, you can dredge. No special equipment needed.
- Weeknight friendly. 30 minutes, one skillet, minimal cleanup.
Ingredients for Crusted Chicken Romano

The ingredient list is short, which is exactly why this works on a busy weeknight. But a few of these matter more than others. Every good crusted chicken romano starts with quality ingredients, and getting these right puts you most of the way there.
Romano cheese is non-negotiable. Buy a wedge and grate it yourself. The pre-shredded stuff in bags has anti-caking agents that mess with the crust texture. You want fine, fluffy shreds that melt into the panko and toast into golden bits.
Meyer lemons are worth hunting for at places like Whole Foods or Trader Joe’s, especially here in California where they’re everywhere. They’re sweeter and less sharp than regular lemons, and their zest perfumes the entire crust. Regular lemons work in a pinch, just expect a brighter, more assertive sauce.
Panko breadcrumbs give you that craggy, shattering crust. Regular breadcrumbs turn sandy. Panko stays light and crisp, which is the whole point of a pan fried chicken cutlet done right.
The chicken itself? Boneless skinless breasts, halved and pounded thin. Even thickness means even cooking, which means no dry spots and no undercooked centers. The rest is pantry stuff: all-purpose flour, eggs, kosher salt, black pepper. Olive oil and butter for the shallow frying technique. Low-sodium chicken stock for the sauce. That’s it.
How to Make Crusted Chicken Romano
The best crusted chicken romano comes together in four stages, each building on the last. Once you’ve done it one time, you’ll basically have it memorized.
Stage 1: Pound the Chicken Even
Slice each breast in half horizontally so you get four thin cutlets. Then pound them between two sheets of parchment to an even 1/4-inch thickness. This step matters more than any other. Thin, uniform cutlets cook in 2 to 3 minutes per side and stay juicy the whole time. Thick parts take longer, which means dry edges. Nobody wants that.

Pat the cutlets very dry with paper towels and season generously on both sides with salt and pepper. Dry chicken means the flour sticks better. Seasoned chicken means flavor in every bite, not just on the surface.
Stage 2: Set Up the Breading Station
Three shallow bowls. In the first, flour with salt and pepper. In the second, beaten eggs with a splash of water. In the third, panko, finely grated Romano, and Meyer lemon zest rubbed together with your fingers until the zest is evenly distributed. That little ritual of rubbing the zest into the crumbs is where the magic starts. The whole kitchen smells like lemon.

Here’s the rhythm: dredge in flour, shake off the excess. Dip into the egg wash, let the extra drip back into the bowl. Press firmly into the panko-Romano mixture, turning to cover both sides completely. This is how to bread chicken for frying without losing the coating halfway through. You’ll feel the texture change as you go, from sandy to pasty to properly clumpy. That’s what you want.
Set the breaded cutlets on a wire rack and give them 5 minutes to rest before frying. This little pause lets the coating set, which means less crust slipping off in the pan.
Stage 3: Pan Fry Until Deep Golden Brown
Heat olive oil and a tablespoon of butter in a 10-inch skillet over medium-high heat. Wait until the butter is shimmering, not just melted. That shimmy tells you the pan is ready.

Lay the cutlets in a single layer. Yes, the oil will sizzle and pop a little. That’s the sound of dinner working. Keep the heat at medium, not high, and you’ll be fine. Cook for 2 to 3 minutes per side until deep golden brown and cooked through, with the center hitting 165°F on a thermometer.
Work in batches if you need to, and move finished cutlets to a clean wire rack so they stay crisp. Piling them on a plate traps steam and softens the crust. The rack keeps every side crunchy.
Stage 4: Make the Meyer Lemon Butter Sauce
Here’s what pushes this over the top. Pour off the excess fat from the skillet, but leave all those browned bits stuck to the bottom. That’s concentrated flavor, and it would be a crime to wash it away.

Add the chicken stock, Meyer lemon juice, and the remaining butter. Scrape up the browned bits with a wooden spoon as everything simmers. About a minute later, you’ll have a glossy, slightly thickened lemon butter sauce for chicken that smells like a fancy restaurant kitchen. Taste it and adjust the seasoning. If you like heat, this is where red pepper flakes come in.
Spoon the sauce over the cutlets right before serving so the crust stays crunchy. Don’t let them sit in it. Serve immediately, with parsley and lemon slices on top.
Tips for the Best Chicken Romano
I’ve made this crusted chicken romano more times than I can count. Here’s what actually makes a difference:
- Pound to an even 1/4-inch. The single most important step. Lopsided chicken cooks lopsided.
- Let the breaded cutlets rest. Five minutes on a wire rack before frying helps the crust stay on the chicken instead of in the pan.
- Use a meat thermometer. 165°F in the center, no guessing, no dry chicken.
- Don’t overcrowd the pan. A crowded skillet drops the oil temperature and steams the coating. Cook in batches.
- Grate your own cheese. Freshly grated Romano clings to the panko better than bagged shreds.
And the common mistakes? Here’s the fast version:
❌ Using pre-shredded Romano with anti-caking agents. → ✅ Grate it yourself from a wedge. The crust will actually stick.
❌ Frying in cold oil. → ✅ Wait for the butter to shimmer before adding the chicken.
❌ Pressing the breadcrumbs too lightly. → ✅ Press firmly so the coating really clings. This is the difference between a crust and a suggestion of a crust.
❌ Cranking the heat to high. → ✅ Medium heat and patience. High heat burns the panko before the chicken cooks through.
Variations to Try
Once the original is in your rotation, here’s how to switch it up:
- Gluten-free: Swap in cup-for-cup gluten-free flour and gluten-free panko. It works surprisingly well.
- Regular lemons: No Meyer lemons? No problem. Regular lemons make a slightly sharper sauce, and it’s still delicious.
- Air fryer version: Cook the breaded cutlets at 400°F for 7 to 9 minutes, flipping halfway. Spray lightly with oil first. Less fat, still crispy.
- A little heat: Red pepper flakes in the sauce. Start with a pinch.
- Sandwich style: Tuck a cutlet into a crusty roll with melted mozzarella for a seriously good dinner sandwich.
My first attempt at this crusted chicken romano had a lopsided crust that slipped off in one spot. Still got demolished by the family. Yours will be better, or just as deliciously messy. Either way, it’s a win.
How to Store and Reheat Leftovers
Leftover crusted chicken romano is a gift. Store the cooked cutlets in an airtight container in the fridge for 3 to 5 days. Keep the sauce separate if you can, so the crust stays as intact as possible.

To reheat and actually keep that crunch: put the cutlets on a wire rack over a baking sheet and warm them at 375°F for 8 to 10 minutes. The rack lets air circulate underneath, so the crust stays crispy instead of steaming against the pan. The microwave works in a pinch, but honestly, it makes the crust sad. Go with the oven.
You can also prep ahead. Bread the cutlets up to 24 hours in advance and keep them refrigerated between parchment layers. Then all you have to do is fry when you’re ready. Perfect for meal prep Sundays.
What to Serve with Chicken Romano
The Cheesecake Factory serves this with spaghetti and chicken romano as the classic combo, and trust me, it works. The tangy marinara balances the salty, cheesy crust beautifully. This crusted chicken romano pairs well with plenty of other sides too:
- Spaghetti with marinara. The classic restaurant move.
- Lemon arugula salad. Peppery greens with a simple lemon dressing echo the citrus in the sauce.
- Grilled zucchini. Especially in August, when the heat makes you want to keep cooking outside.
- Crusty garlic bread. Essential for soaking up every drop of that Meyer lemon butter sauce.
- Roasted asparagus. Simple, green, and it doesn’t compete with the chicken.
When you pull that first golden cutlet out of the pan, and you will, it’s going to be a moment. The smell of lemon and toasted panko. The crackle as your fork breaks through the crust. The pride of serving a restaurant-worthy plate for a fraction of the price.
If you make this, leave a comment below and tell me: did your family think you ordered takeout? And for more copycat cheesecake factory recipes and restaurant style chicken recipes like this one, come follow my Pinterest board full of weeknight dinner winners.
Crusted Chicken Romano with Meyer Lemon Butter Sauce
Ingredients
Method
- Cut the chicken breasts in half horizontally so you have 4 thinner pieces. Place them between two sheets of parchment paper and pound to an even 1/4-inch thickness. Blot the cutlets very dry with paper towels and season generously on both sides with salt and pepper.
- Set up a breading station: in one shallow bowl, whisk together the flour, 1 teaspoon salt, and 1/2 teaspoon pepper. In a second bowl, beat the eggs with the water until smooth. In a third bowl, rub the panko, Romano cheese, and Meyer lemon zest together with your fingers until the zest is evenly distributed.
- Coat each cutlet in the flour mixture, shaking off any excess. Dip it into the egg wash and let the extra drip back into the bowl. Press the cutlet firmly into the panko-Romano mixture, turning to cover both sides completely. Place the breaded cutlets on a wire rack and repeat with the rest. Let them rest for 5 minutes so the coating sets.
- Heat the olive oil and 1 tablespoon butter in a 10-inch skillet over medium-high heat until the butter is shimmering. Add the cutlets in a single layer, working in batches if needed, and cook for 2 to 3 minutes per side until deep golden brown and cooked through. Move the cooked cutlets to a clean wire rack to keep them crisp.
- Pour off any excess fat from the skillet, leaving the browned bits behind. Add the chicken stock, Meyer lemon juice, and the remaining 2 tablespoons butter. Scrape up the browned bits with a wooden spoon and let the sauce simmer for about 1 minute until it thickens slightly. Taste and adjust the seasoning, adding red pepper flakes if you like a little heat.
- Spoon the sauce over the cutlets right before serving so the crust stays crunchy. Garnish with fresh parsley and lemon slices and serve immediately, without letting the cutlets sit in the sauce.
Nutrition
Notes
Tried this recipe?
Let us know how it was!Frequently Asked Questions
Source: Learn More About This Dish